
 2299
2299
Background
In Clarity, Services are set up as service categories with multiple Service Items under them. For example, a "Food" service may have "Meal Voucher," "Bag of Groceries," and "Meal On Site" as service items that are available to provide to clients. Service items are the actual services provided to the client, and are what shows up on various reports, like APRs and CSV exports. This article explains how to record Service Items that have been set up as "Long Term," meaning they generally are services that are not given to clients every day. For Attendance based Service Items, please see this article.
This video contains most but not all of the same information in this article.
Adding Services
Step 1: Search for the client record that you want to add a service item to, once you have found their Client Record, select the Edit icon.
(Note: Please visit our Knowledge Base article on Searching for Client Records for more details)
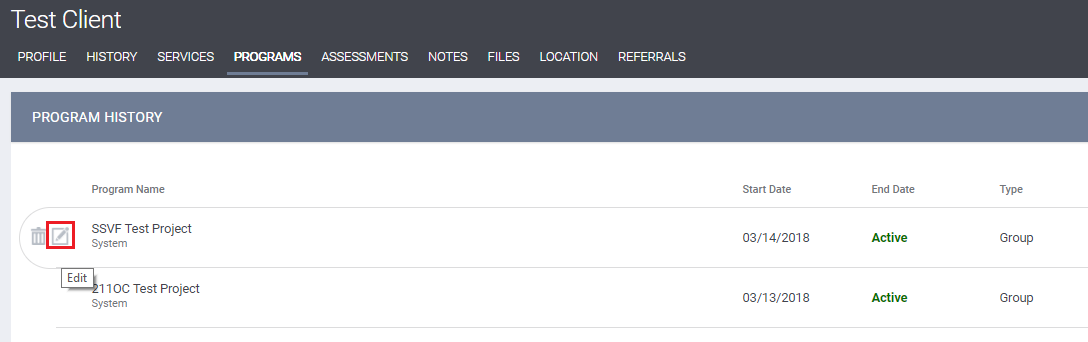
Step 2: Click on the Program tab, then click on the Edit icon that appears when you hover next to the name of the program that the client is enrolled in. Please note that services can only be added to enrollments that have an Active status.
Step 3: Click on the Provide Services tab, and you will see a list of Services that your agency offers.
(Note: In Clarity, Services refers to the category of Service Items available to provide, you provide Service Items to clients.)

Step 4: Select the Service Item you want to provide to the client and enter the following information, then select Submit.
- Start Date & End Date for the service
- Include Group Members: Click the switch next to the names of other members of the household who received the service.
- Service Note: Enter information about the provision of the service.
- (Note: A service note is not a case note, it is simply information about the service you are providing)

Adding Geolocation
Some service items may have the option to add geolocation. Like location records created from the Location tab, geographic location information recorded with service items can be added either manually or using geolocation information based on the device location.
Step 1: Select a Add Location. A location map will appear in a new window, you can enter the location manually or add a pin with in the map and click add.


Different Service Types
Some service items require an Expense Amount to be added. For these service items, you will provide an Expense Amount, Expense Date, and Funding Source.
- Expense Amount - Depending on the setup of the service, this may be either an adjustable or a pre-determined amount that cannot be modified.
- Expense Date - The date the expense was issued.
- Funding Source - Depending on the setup of the service, this may be adjustable, or automatically set to a pre-determined funding source.

Some service items occur more than once a day and can be time-based.
(Note: The clock icon will only appear if the service is set up as multiple attendance.)
Step 1: Select a Start Date, this will open a time dialogue requesting the Hour and Minute of the service. To set the time, use the Hour and Minute dropdowns to select the appropriate time for the service.
A service can also be Time Tracked which is commonly used for the Case Management services. This function allows you to keep track of how much time you’ve spent on a service.
Simply open up the desired service, enter the amount of time spent on it, then click Submit.


