
 1782
1782
Background
In order to be served through the Coordinated Entry System, households must be enrolled in the Coordinated Entry project, and complete the Individual or Family CES Assessment. Once the Individual or Family Assessment is completed, the case worker must collect and upload any required documentation for the household and complete a Current Living Situation Assessment. Once that is completed, the household can be added to the Community Queue, where they can be matched to housing opportunities.
Enroll the Household, and complete the Individual or Family CES Assessment
Step 1: The Family Coordinated Entry and the Individual Coordinated Entry projects are set-up under the County of Orange agency. Review the Additional Agency Access article for instructions on accessing these agencies in HMIS. Please note that any user wishing to access these agencies must complete the HMIS Coordinated Entry Training, and must also be approved for access by the agency managing the Coordinated Entry project the user needs access to. Anytime a user at an access point completes any data entry related to Coordinated Entry they should first access the agencies mentioned above.
Step 2: If the household is not already in HMIS, create a Client Profile for all household members. Please visit our Knowledge Base article on Adding Client Profiles and Adding Release of Information for more information.
Step 3: Create an enrollment for all household members under the appropriate Coordinated Entry project in HMIS. The enrollment screen will include custom questions that are required for clients that are being served through CES. Please visit our Knowledge Base article on Enrolling Clients in a Project for more information.
It's critical for clients to answer the Program Entry questions completely and accurately to ensure they are matched to housing opportunities as quickly as possible. We recommend sharing the following script with clients prior to completing the entry questions: "Information you share with us in these questions is valuable and important. This information helps us connect you to services and housing. The information about your living situation, disabling conditions, city of last permanent housing and the city where you were last night are really important because they help us understand your service and housing needs and eligibility."
Step 4: Once an enrollment has been created for for each client in the household, go to the Assessment tab under the Head of Household's enrollment. Click Start next to the appropriate assessment.
- Individuals should complete the Individual CES Assessment.
- Families should complete the Family CES Assessment.
- Youth and Veteran households should complete the CES assessment that matches their household composition.
Please note Veteran households will be included on the Veteran CES reports when the Head of Household's veteran status is yes on the client profile and they are enrolled in CES. Youth households will be included on the TAY CES reports if all household members are under the age of 25 years and are enrolled in CES.

Step 5: After answering all the Individual or Family CES Assessment questions, click Save.
The household has completed a Individual or Family CES Assessment, and is considered Assessed. At this point the household has not been added to the Community Queue, which is where the household can be matched to housing opportunities. Before the household can be referred to the Community Queue, the case manager working the household needs to ensure that the required documents have been collected. Please follow the process below to learn how to enter the household's documents and add the household to the Community Queue.
Adding Required Documentation
Step 1: Search for the Client Profile for the client you want to add documents under, and click the Edit icon. Documents should be added to the Head of Household's record. Please visit our Knowledge Base article on Searching for Client Records for more details.

Step 2: Click on the Files tab of the client record, and click on the Add File icon.

Step 3: Select the following information on the Upload a File section, and click Add Record.
- Category: Select Coordinated Entry Documentation
- Name: Select the type of document that us being uploaded
- File: Upload the file from your computer
- Private (optional): Select this switch if the record should be made private

Once the household has the required documentation on file, the household must be added to the Community Queue in order to be matched with a housing opportunity. Please do not add a household to the Community Queue until the required documentation has been uploaded. Participants can be referred to the Community Queue with the minimum required documentation. Access Points are encouraged to continue uploading additional verification of homelessness and disabling conditions if applicable to verify chronic homelessness.
Minimum Documentation Required to be added to the Community Queue:
- Verification of Homelessness
Update the Current Living Situation
Please refer to the Completing Current Living Situation Assessments knowledge base article for instructions on creating and updating the Current Living Situation in HMIS.
Referring Households to the Community Queue
Step 1: Search for the Client Profile of the Head of Household for whom you want to refer to the Community Queue, and Edit their profile.
Step 2: Go to Program tab, and click on Edit next to the client's Coordinated Entry enrollment.

Step 3: Go to Assessment tab, and click on the Eligibility button.

Step 4: Click on the Refer Directly to the Community Queue button to add the household to the Community Queue. This is often a missed step. Make sure you scroll down the page to find the button.

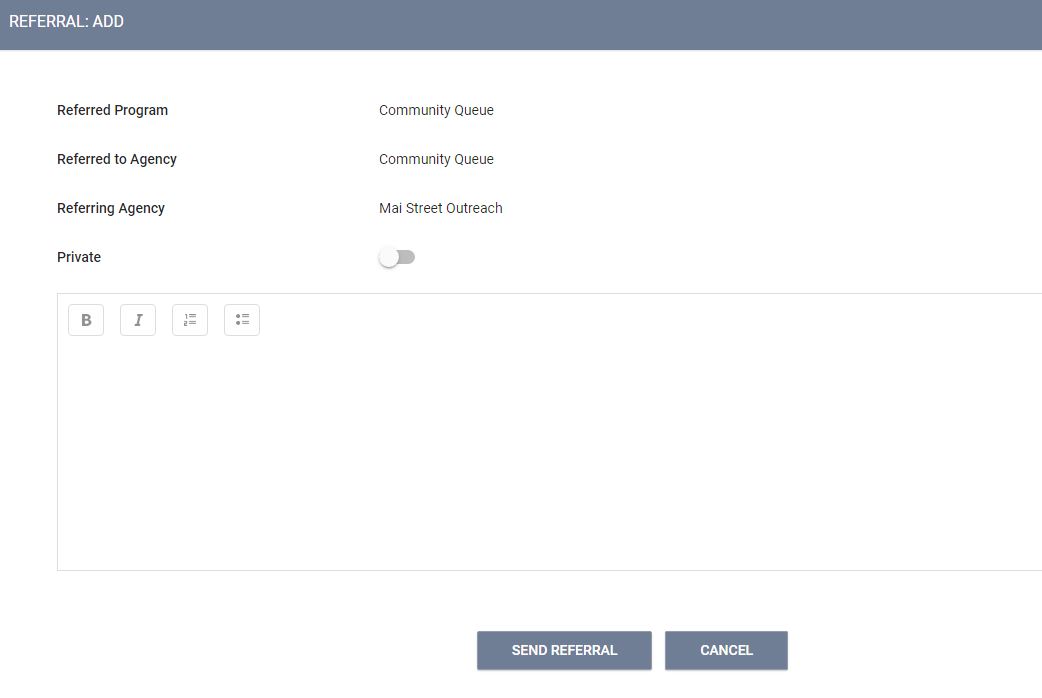
Step 5: On the next screen, you are given the option to write a note to the Referral Agency. Notes can include information on housing preference, client characteristics, or information you have gathered during case management. Example of such notes are: "Clients requires LGBTQ-friendly housing" or "Client requires first floor". Click on Send Referral to add the household to the Community Queue.
At this point, the household is Document Ready and has been added to the Community Queue. The household is now waiting to be matched to a housing opportunity.
Please note that households must have activity at least every 90 days in order to remain on the Community Queue. Please review the Maintaining Households on the Community Queue article for more information.

